4.DPI ( Direct Programming Interface)
VeritakSV supports most of DPI. (There are a few items to be implemented.)
4.1 Supported C Compiler
Supported C Compiler is Visual Studio 2012 only. You can use free version "Express 2012 for Windows Desktop". With Express edition, you can develop both native 32bit and 64bit
application with VeritakSV.
4.2 Difference between DPI and VPI
Main advantage of using DPI is speed. DPI is much faster than using VPI
in general. Disadvantage is difficulty for debugging on development.
A value that is passed through the DPI is specified in SystemVerilog code
as a value of SystemVerilog type,while the same value shall be specified
in C code as a value of C type. Therefore, a pair of matching type definitions
is required to pass a value through DPI: the SystemVerilog definition and
the C definition. It is the user’s responsibility to provide these matching
definitions. It can be easily crashed if invalid arguments are passed.
Sometimes you may be annoyed by crash in development, but with the help
of Vistula Studio debugger, you will find the cause of the crash.
Another advantage is you can write your testbench on C domain with time
consumption like task in systemverilog. In exact words, you can call time
consuming task in systemverilog. This feature can not be achieved by using
VPI.
It is noted if your DPI runs in program region, then your DPI is race-free
to hardware descriptions on modules.
4.3 Using C-Runtime Library
First example is calling c-runtime library. In this example, we need no C files for compilation because cos or sin functions are built-in library in C-runtime.
The example is located in dpi_samples\c_runtime_call\source\cos.sv.
module incremental_call_test;


        import "DPI-C"  pure function real cos (real n1);//No C file is required for C-runtime library.
        import "DPI-C"  pure function real sinh (real n2);//No C file is required for C-runtime library..

`define PAI 3.14159265358979323846
        initial begin

                for(int i=0;i<=90;i++)
                        $display("cos=%f sinh=%f",cos(i*`PAI/180),sinh(i*`PAI/180));

        end

endmodule
The import statement declares that the function is implemented a foreign
language and "DPI-C "specifies C language. We get the result
as real (double in C world) and one argument is real (double in C world).
4.4 How fast does DPI run?
We compared running time by following sv source.
| Items | `ifdef definition | result |
|---|---|---|
| SV inline statement | USE_INLINE | 203ms |
| SV function call | USE_SV_FUNCTION | 639ms |
| VPI function call | USE_VPI | 20701ms |
| DPI call | USE_DPI | 359ms |
Intel Core5-2500K 3.3GHz
The projects are located in dpi_samples\simple_call\source.
//`define USE_SV_FUNCTION//USE_INLINE
program incremental_call_test;

`ifdef USE_DPI
        import "DPI-C"  pure function int inc (int n1);
`else

        function  int inc(int i1);
                return i1+1;
        endfunction

`endif

        int i;

        initial begin
                i=0;
                repeat(100000000) begin
                        `ifdef USE_INLINE
                                i++;
                        `elsif  USE_DPI
                                i=inc(i);
                        `elsif USE_SV_FUNCTION
                                i=inc(i);
                        `elsif USE_VPI
                                i=$Increment(i);
                        `endif

                end
                $display("i=%d",i);


        end

endprogram
I know your question why VPI is so slow.
The answer becomes very clear if you compare the C sources.
DPI source is just simple by direct coding.
__declspec(dllexport) int inc (int i)
{
        return i+1;
}
VPI source is as follows.
static int sys_Increment(char*  name)
{

 vpiHandle systfref, argsiter, argh;

  s_vpi_value value;
  unsigned int num;
  unsigned i;

  systfref = vpi_handle(vpiSysTfCall, NULL); /* get system function that invoked C routine */
  argsiter = vpi_iterate(vpiArgument, systfref);/* get iterator (list) of passed arguments */

        for (i=0;i<1;i++){
                argh = vpi_scan(argsiter);/* get the one argument - add loop for more args */
                if(!argh){
                                vpi_printf("$Increment: missing parameter. \n");
                            return 0;

                        }

                value.format = vpiIntVal;
                vpi_get_value(argh ,&value);
                num=value.value.integer;
        }


        if(argh) vpi_free_object(argsiter);

        value.value.integer =num+1;
        value.format = vpiIntVal;/* return the result */

        vpi_put_value(systfref ,&value, NULL, vpiNoDelay);

        return(0);

 }

//32bit
static int sys_systems_size_tf(PLI_BYTE8* p)
{
        return 32;
}

void sys_inc_vpi_register()//VPI call/callback register routine
{
      s_vpi_systf_data tf_data;

      tf_data.type      =vpiSysFunc;
      tf_data.sysfunctype       =vpiIntFunc;
      tf_data.tfname    = "$Increment";
      tf_data.user_data = "$Increment";
      tf_data.calltf    = sys_Increment;
      tf_data.compiletf = 0;
      tf_data.sizetf    = sys_systems_size_tf;
          vpi_register_systf(&tf_data);

}

__declspec(dllexport) void (*vlog_startup_routines[])() = {//VPI startup
      sys_inc_vpi_register,
       0
};
4.5 Should we re-write and replace VPI? ( Measure time in crucial part)
Let's study a test case.
The project is located in dpi_samples\LynsysVS12\source.
We are currently using VPI as follows.
Vout = $LinSys_SisoCalc(CurrentSystem, V);
This is crucial time part. We would like to measure the time consumption
in this call before we replace this by DPI as exactly as possible.
You can also use DPI for this purpose.
import "DPI-C" function longint get_tick();

		longint tick1=0,tick2=0;


		tick1=get_tick();//Measure Time between From here

			Vout = $LinSys_SisoCalc(CurrentSystem, V);

		tick2=get_tick();//to here.
		tick1 -=tick2;
		$display("%d",-tick1);//$display costs a lot.
get_tick() returns 64bit counter value in CPU that clock at CPU frequency.
(If counter difference is 300 ,it means around 100ns when CPU clock is
3GHz.)
Here is its C- source.
DPI_LINK_DECL DPI_DLLESPEC
__int64 get_tick()
{
        return __rdtsc();//Inline rdtsc asm is expanded here.
}
Note:
If you are running multiple CPUs , then it may sometimes display unstable value because each CPU has independent own counter. In that case, you must consider to use SetThreadAffinityMask API.
Finally we evaluate each time consumption by changing `ifdef statements.
                tick1=get_tick();//Measure Time between From here
//`define DPI
`define SHOW_TIME_DIFFERENCE

`ifdef DPI
                Vout=LinSys_SisoCalc_DPI($time,CurrentSystem,V,state);//VPI dpi call
`else
                Vout = $LinSys_SisoCalc(CurrentSystem, V);//VPI call
`endif

                tick2=get_tick();//to here.
                tick1 -=tick2;
`ifdef SHOW_TIME_DIFFERENCE
                $display("%d",-tick1);//$display costs a lot.
`endif
By evaluating crucial part, we can expect total peformance gain.
4.6 How to invoke Visual Studio Express
We write simple systemverilog that calls simple imported C with DPI in
this section.
Generally we will take following procedure.
program my_first_dpi;

 import "DPI-C"  pure function int inc (int n1);

        int i;

        initial begin
              i=inc(i);
			  $display("i=%d",i);
		end

endprogram
4.6.2 Make VeritakSV project that generates C- header file
Check Generate C Header on Project Settings
Running the project(gen_cheader) generates C header file as follows.
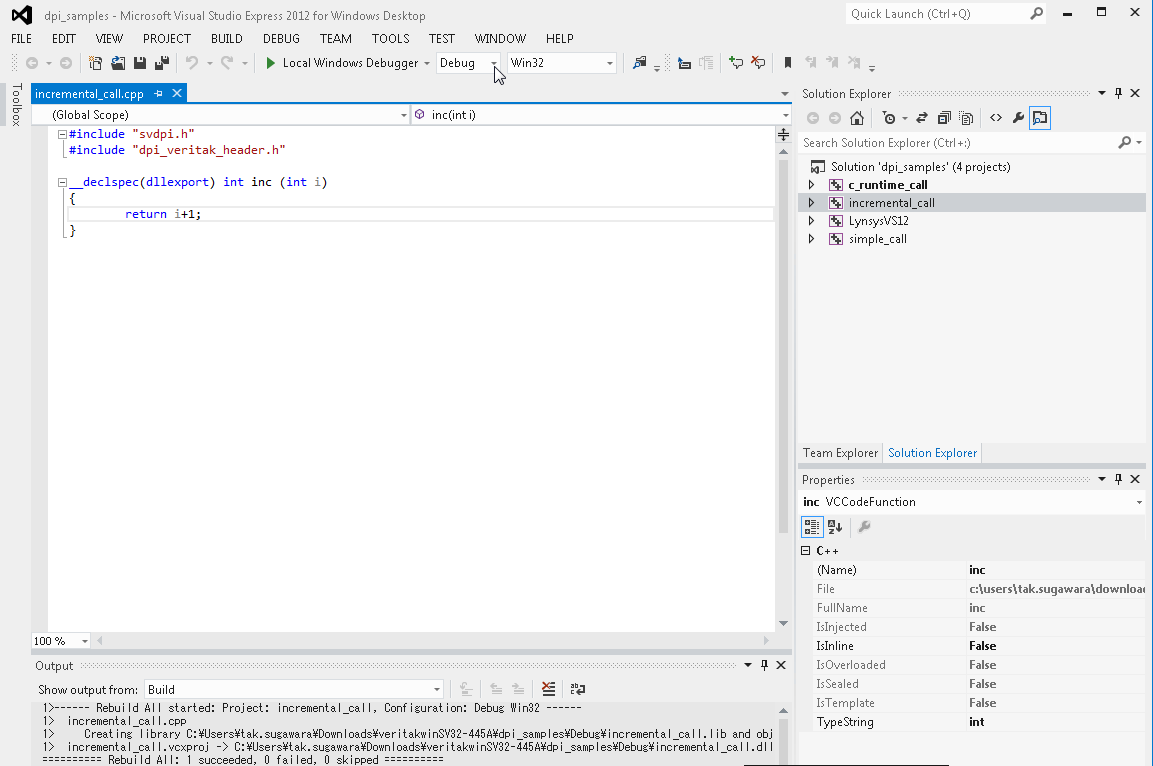
/* Copyright 2013 www.sugawara-systems.com
* Note:
*   This file is automatically generated.
*   Please do not edit this file - you will lose your edits.*/

#ifndef INCLUDED_DPIHEADER
#define INCLUDED_DPIHEADER
#ifdef __cplusplus
#define DPI_LINK_DECL  extern "C"
#else
#define DPI_LINK_DECL
#endif
#include "svdpi.h"

DPI_LINK_DECL DPI_DLLESPEC
int inc(int );

DPI_LINK_DECL DPI_DLLISPEC
 int run_sc_task_vthread(unsigned sc_back_patch_no, void* first_arg_address);
#endif
#include "svdpi.h"
#include "dpi_veritak_header.h"

__declspec(dllexport) int inc (int i)
{
        return i+1;
}
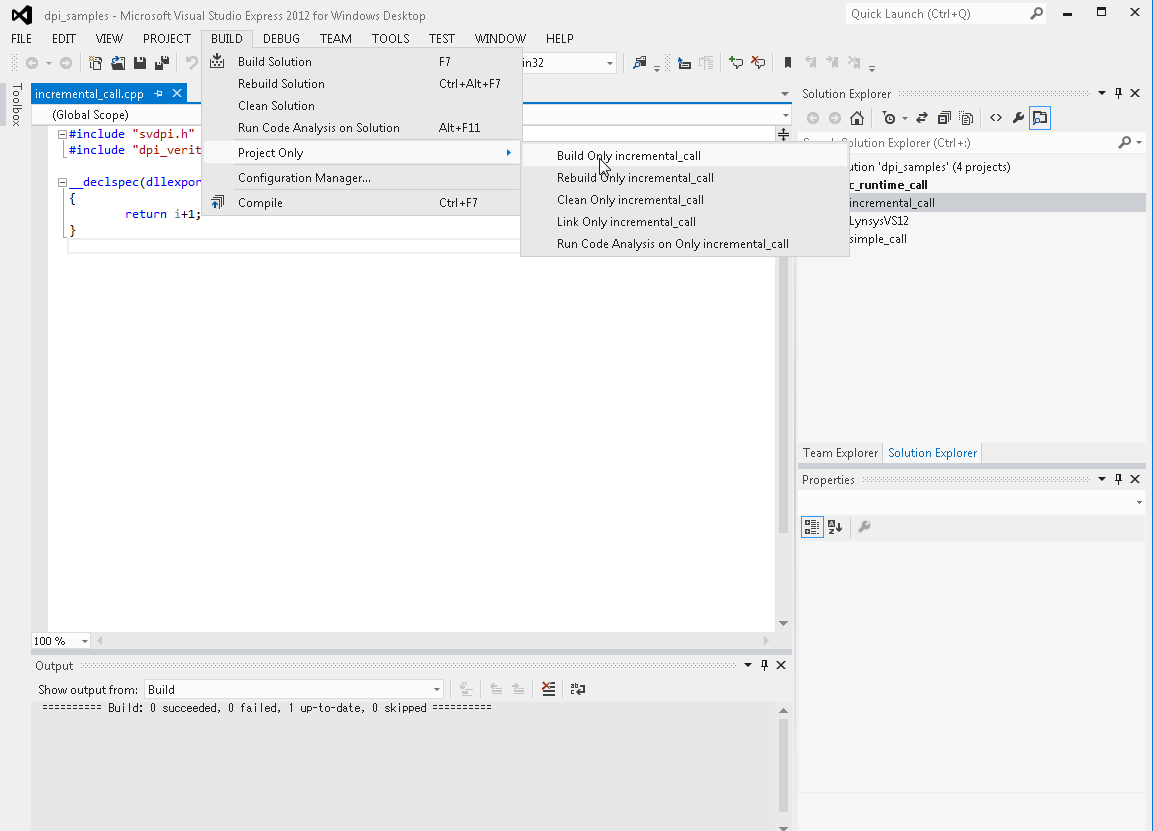
4.6.4 Compile C with Visual Studio Express
First thing is to make a project of visual studio.
Open solution in dpi_samples.
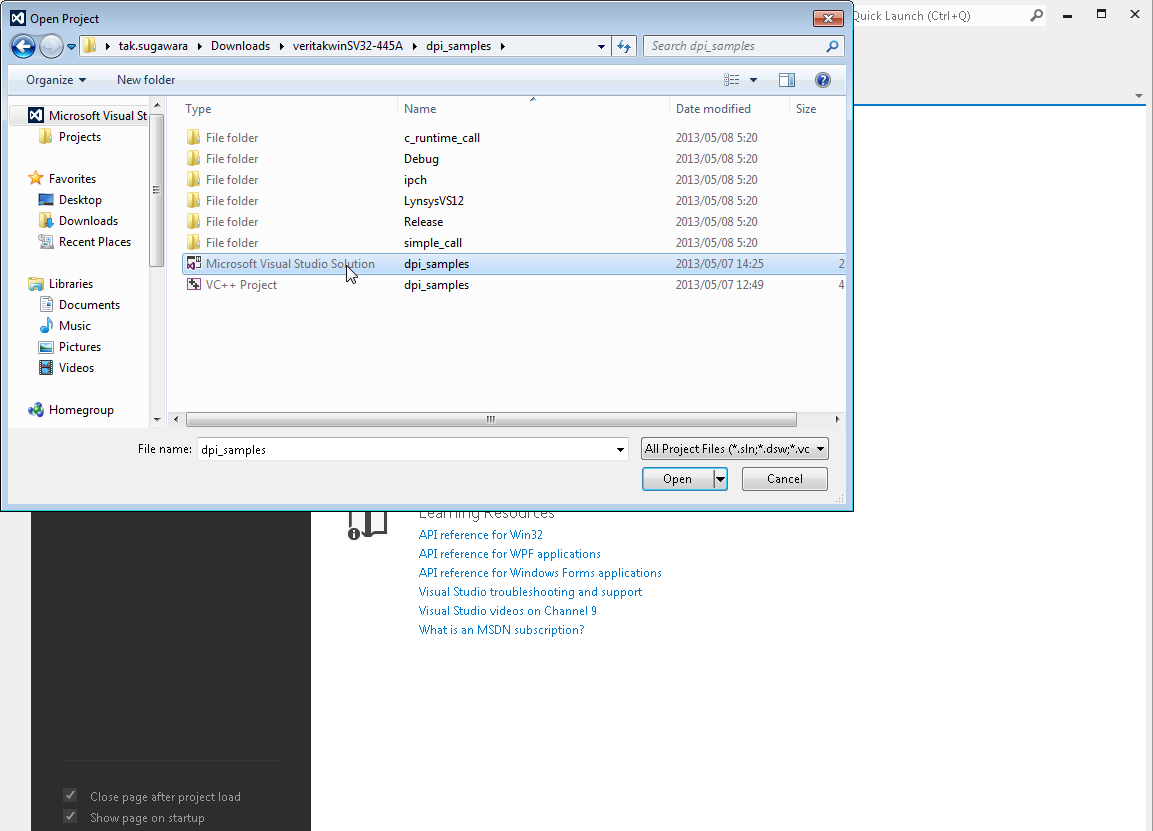
View ->solution_explorer.
Right Click on dpi_samples.
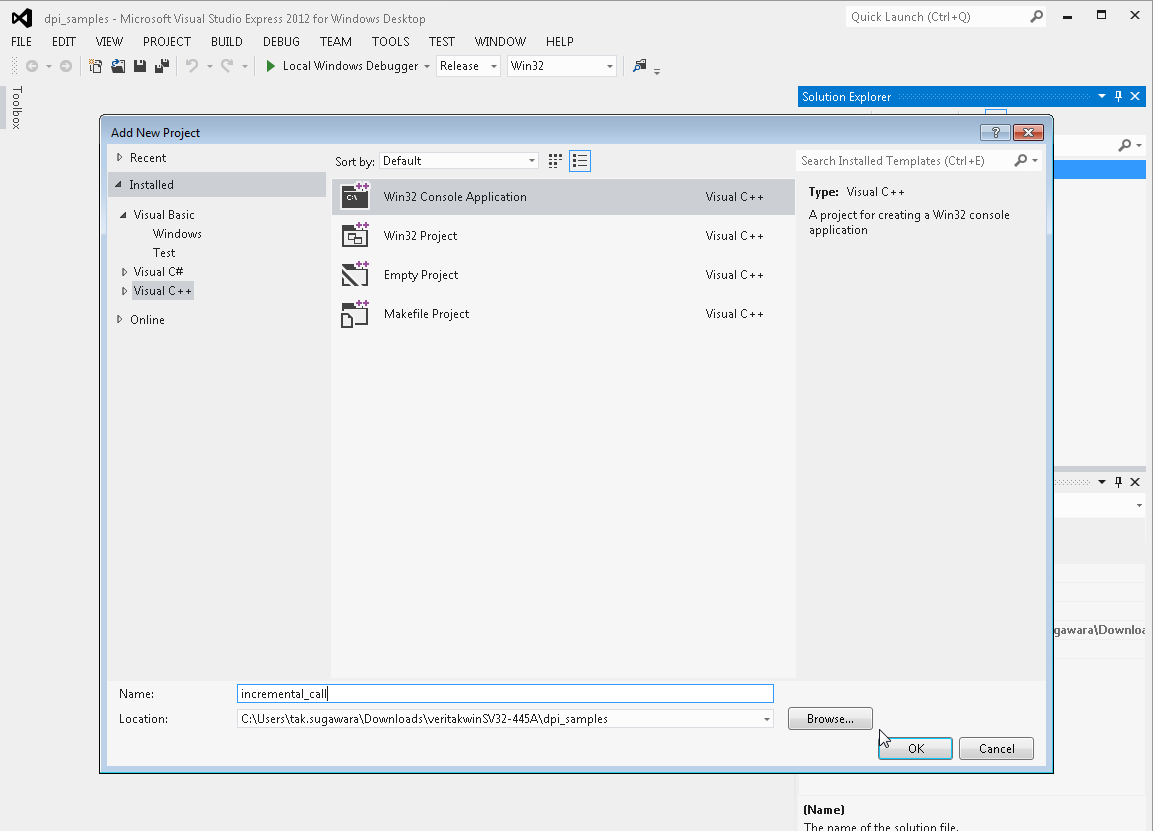
We build new project on dpi_samples.

We build the new project "incremental_call" as Win32 Console
Application.
Check/Uncheck as follows.
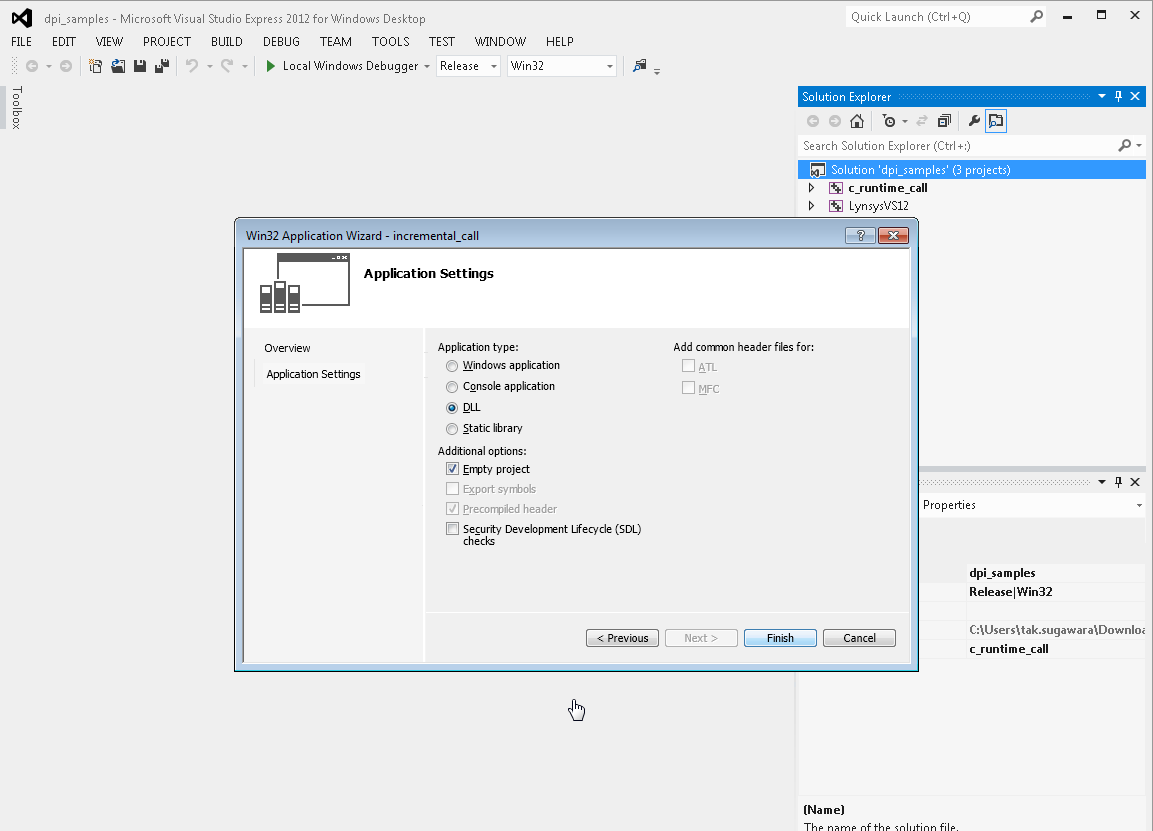
We add c++ source file as existing item to the project.
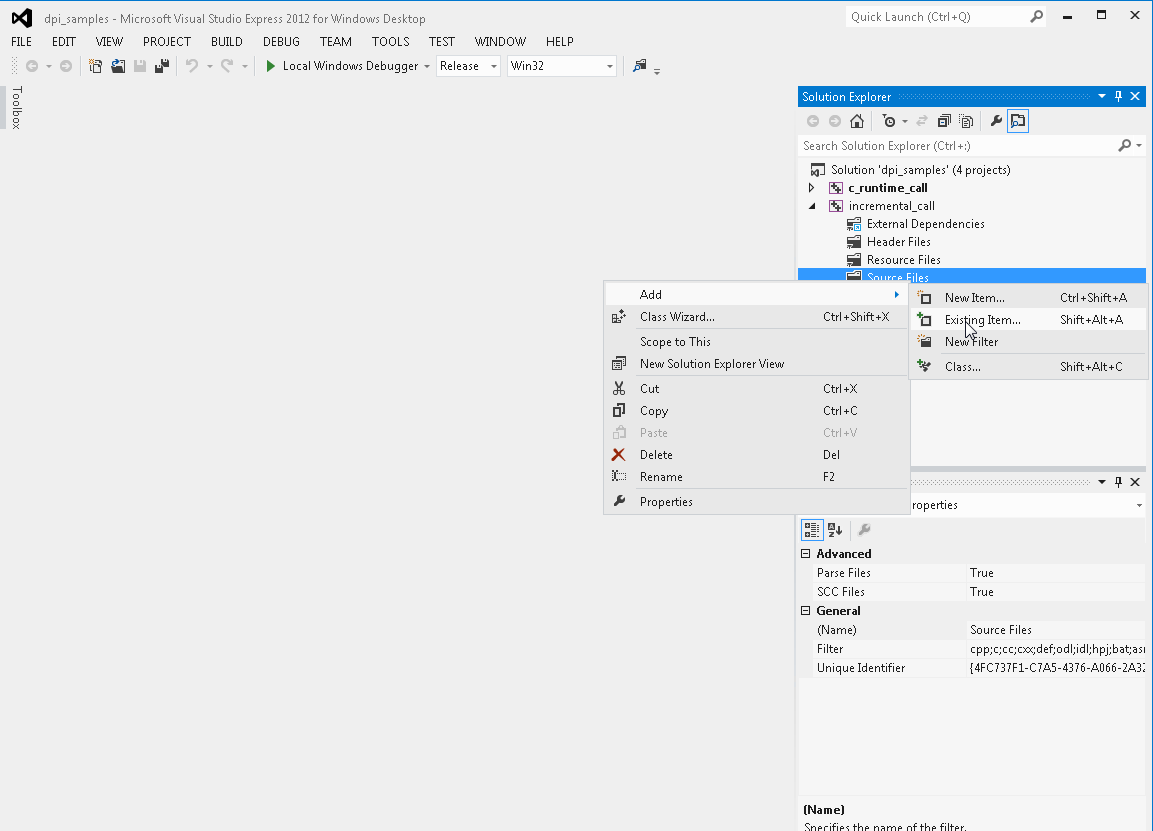
We make source folder under incremental_call to place source files.
incremental_call.cpp is shown in above.

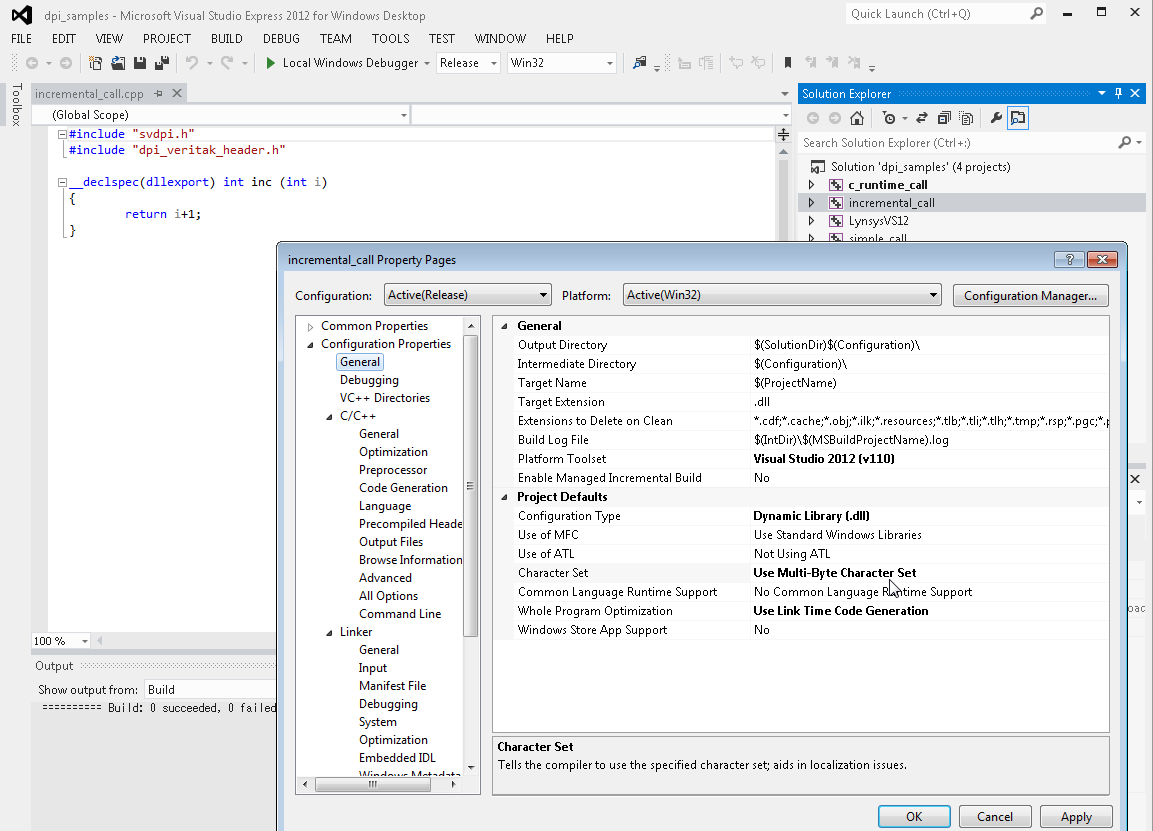
Property Settings should be as follows.
Set Multi-Byte Character Set.
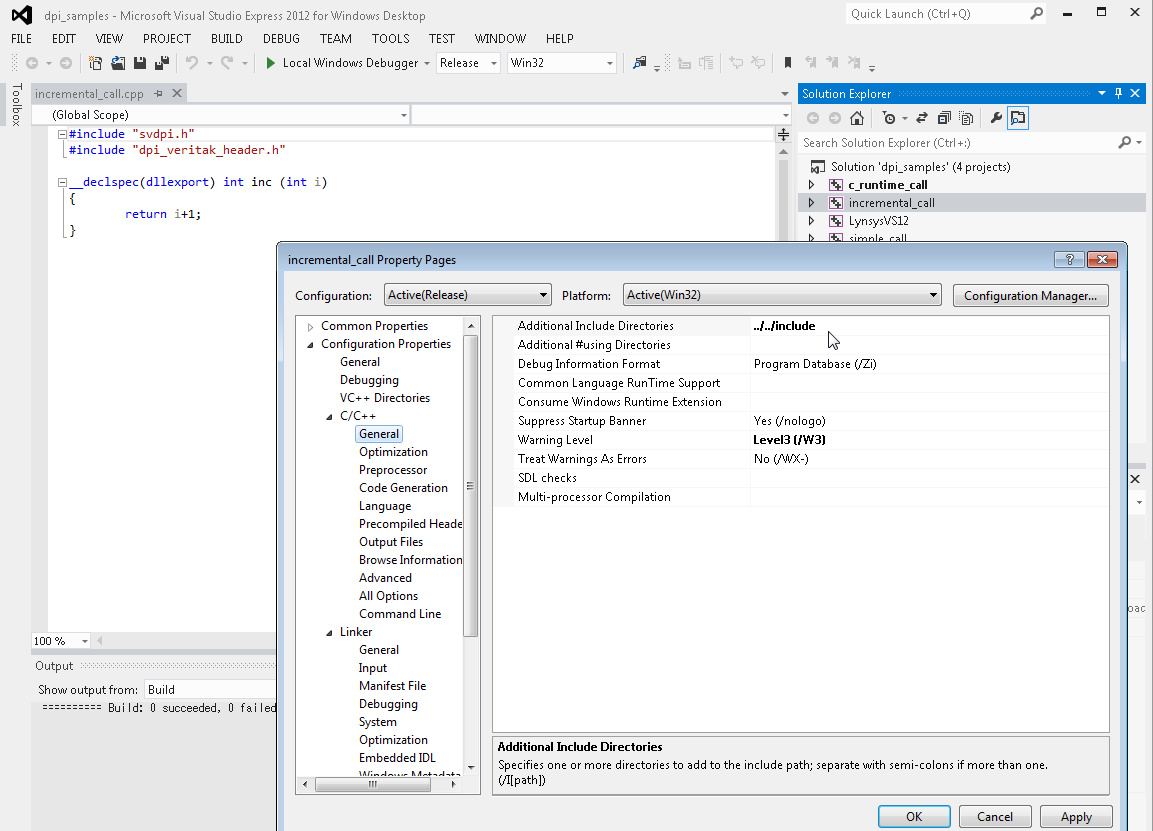
"svdpi.h" is located in ../../include folder for VS project.
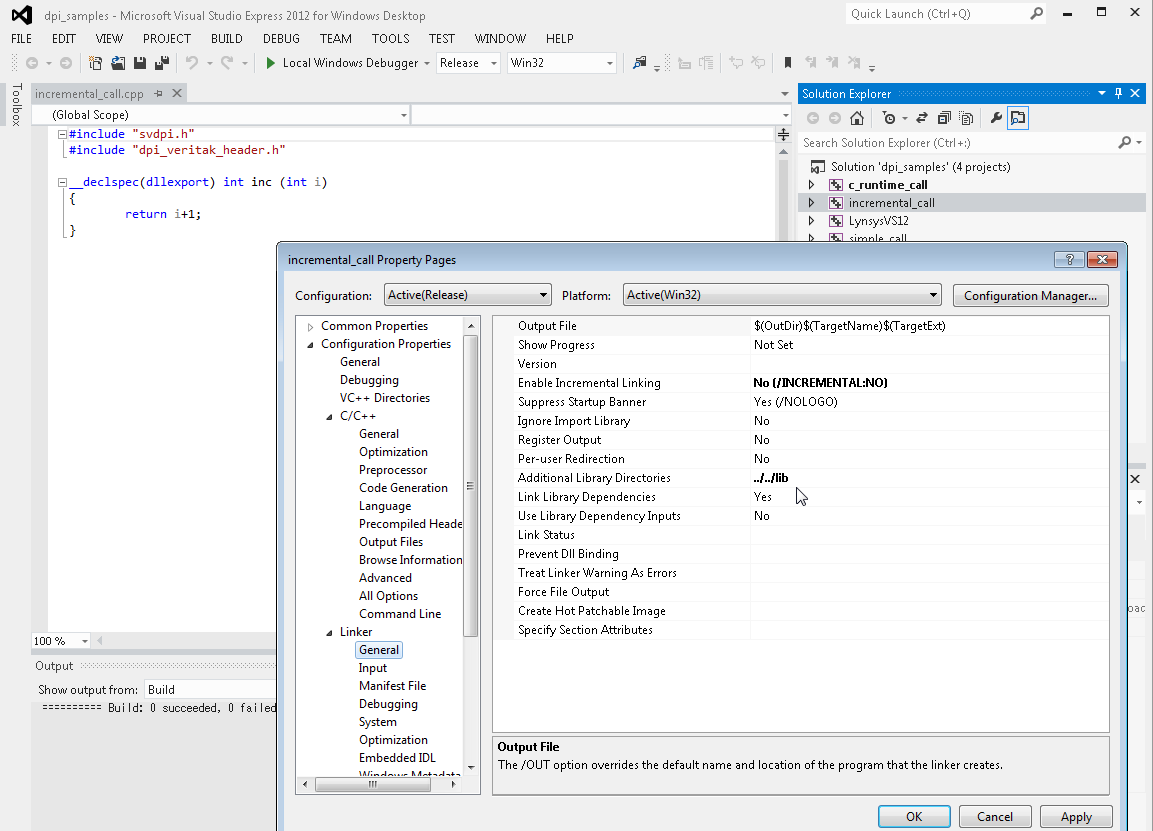
We need to link veritak_sv.lib in ../../lib folder.

Now all the settings are complete.
We build DLL for the project.
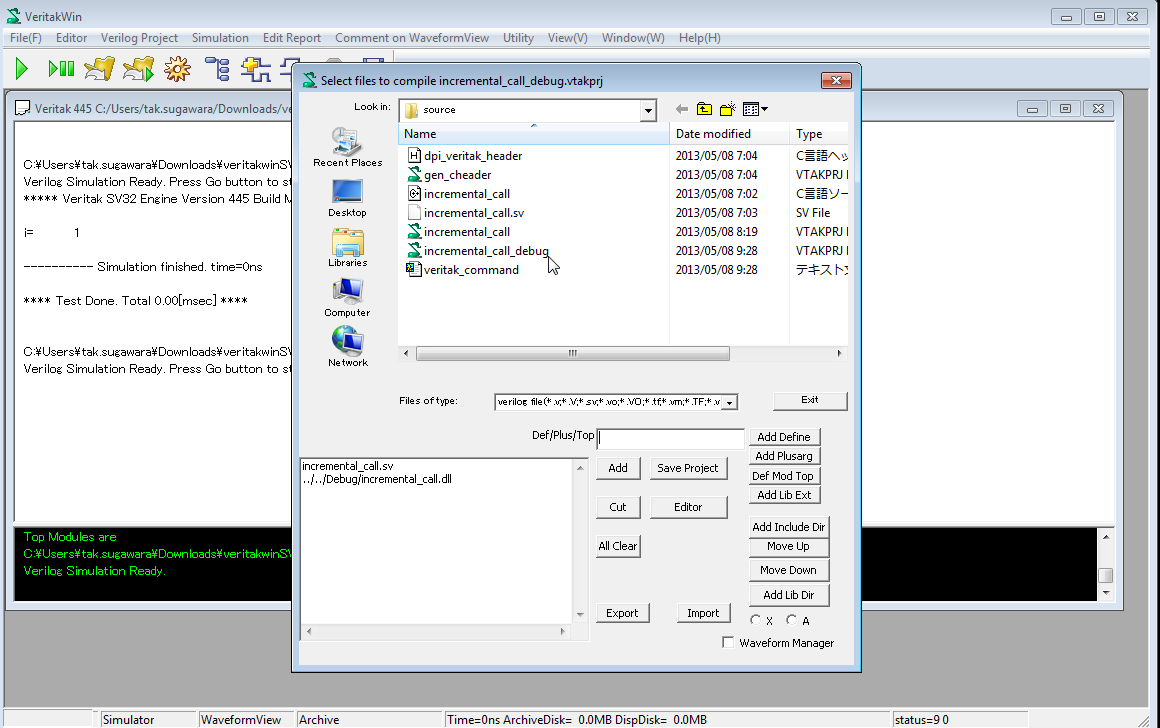
4.6.5 Make VeritakSV project that loads the DLL

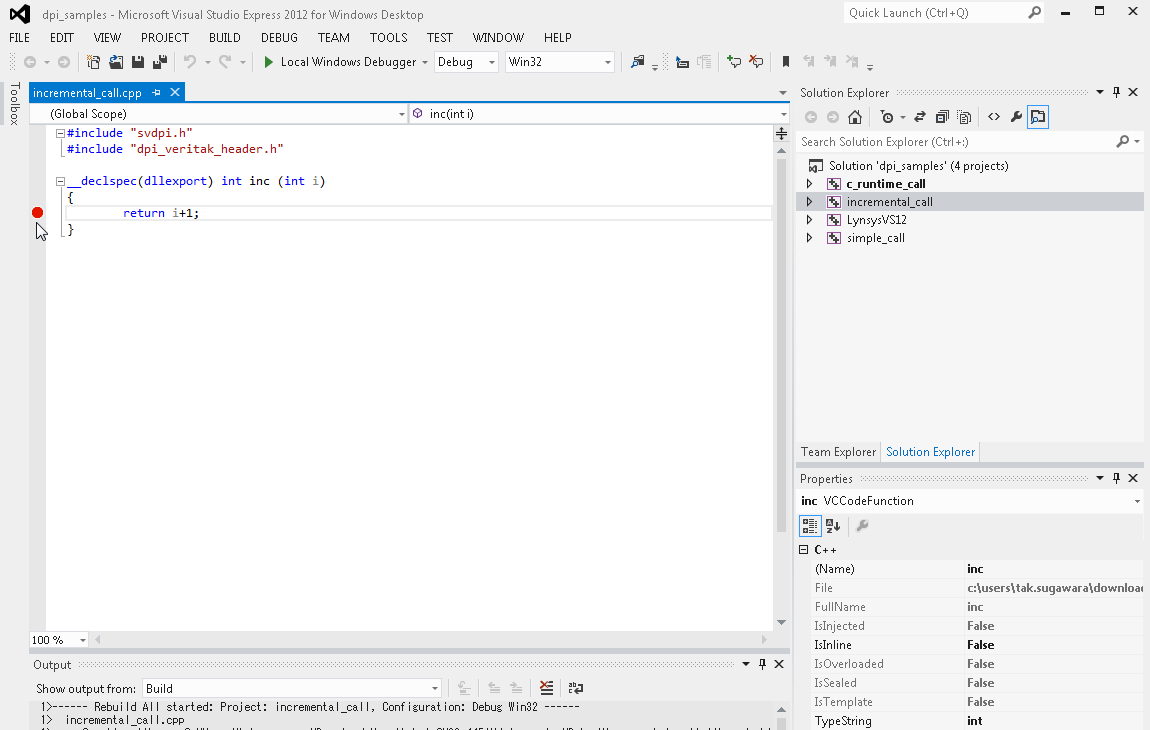
4.7 How to Debug DPI
You need to build the project as "Debug Project ".
Configure Debug and the build the project again as described above.
Since generated dll is located in different folder from Release, we make
another project for debug.
Load the project.
Do not Press go button yet.
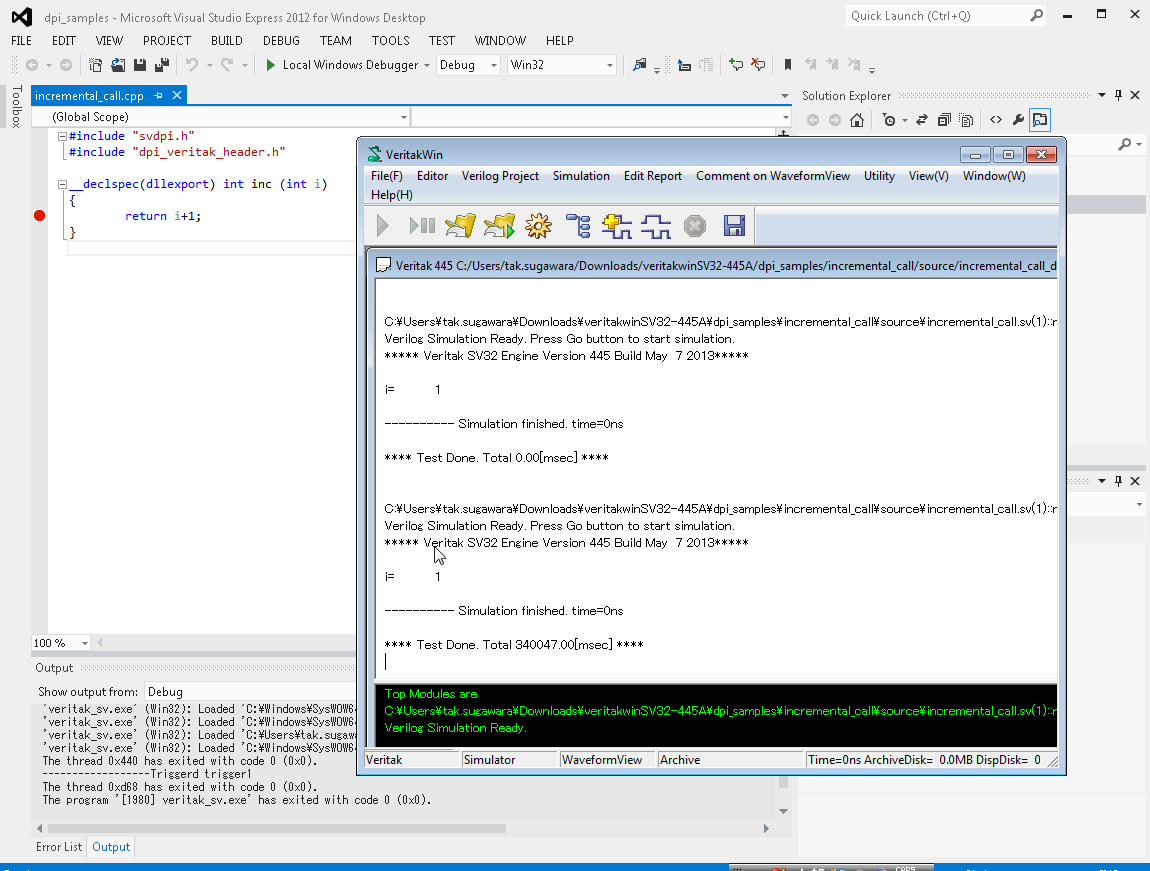
Set breakpoint as below.
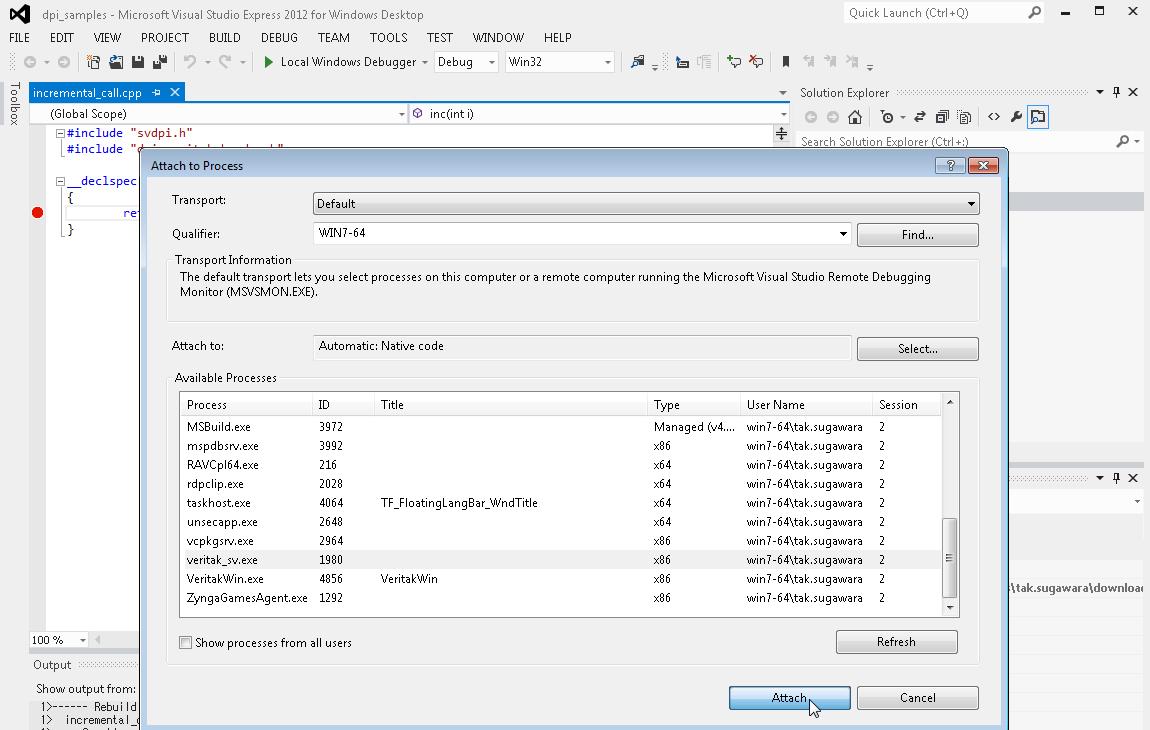
We attach Visual Studio Debug to veritak_sv.exe. Because the DLL exists
in veritak_sv.exe now.
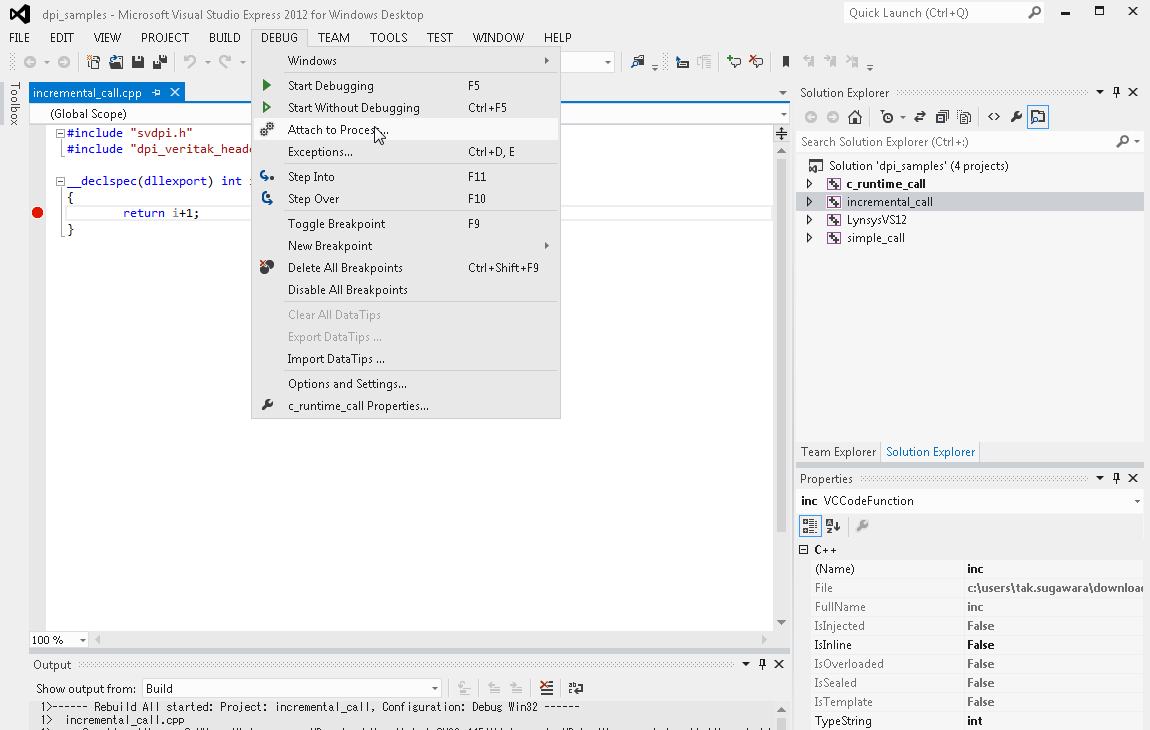
Attach to veritak_sv.exe
Press go button.
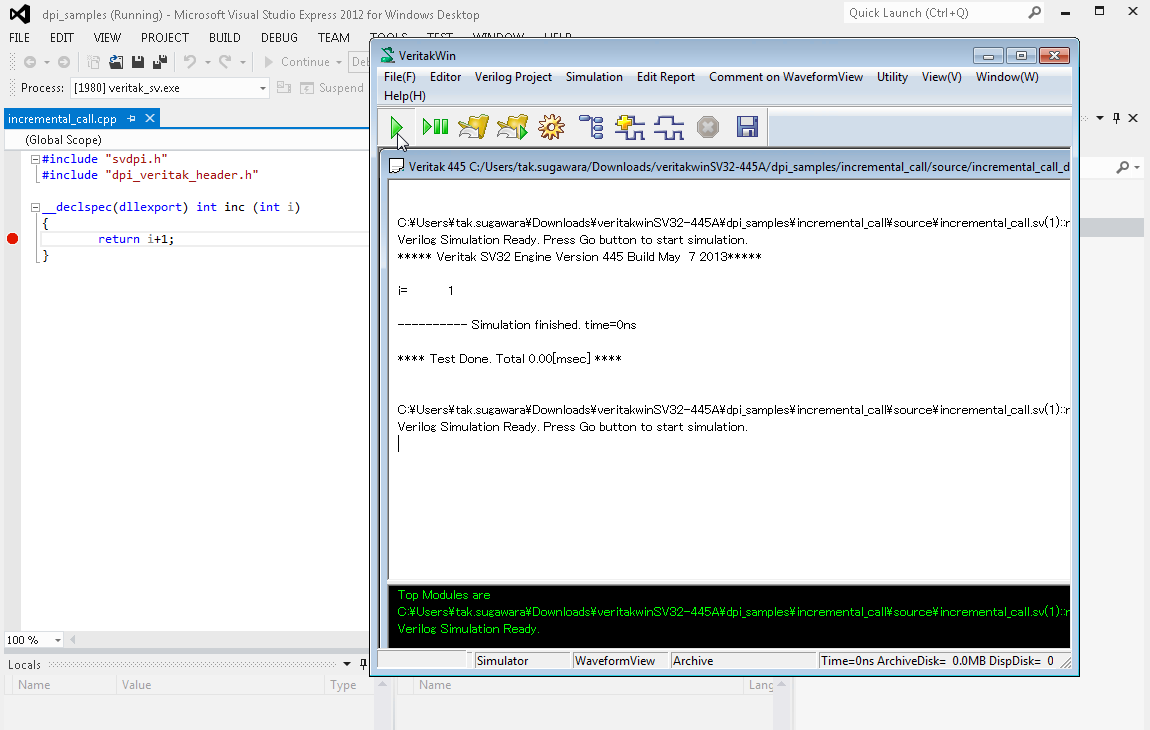
Here we come to the breakpoint.
You can inspect variables value by Locals window or tooltip.
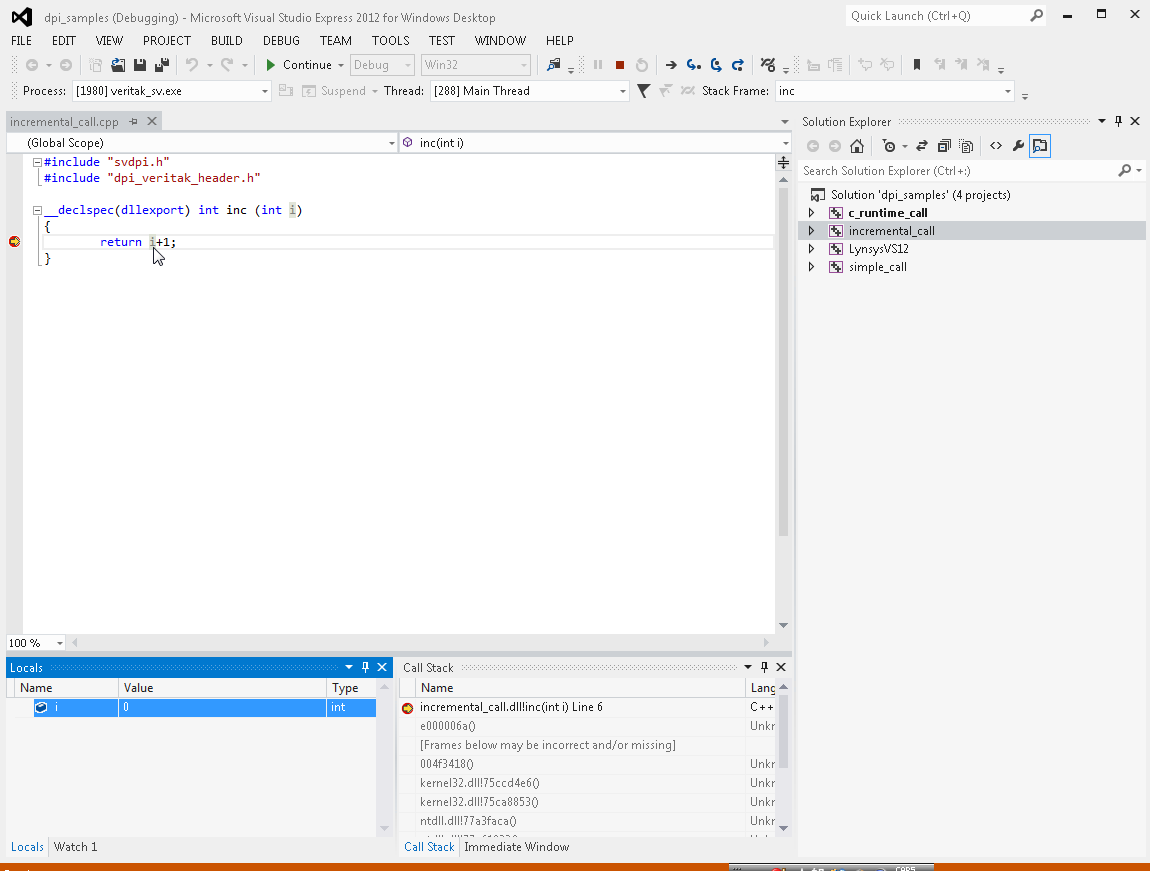
F5 Key makes to continue.
Notes:
Attach/Detach
You can not use visual studio debug and VeritakSV's debugger at the same time.
VeritakSV's own debugger attaches to veritak_sv.exe when you make step
or place an breakpoint. Therefore if you do not use those functions you
do not worry about the limitation. If you need to switch veritak to Visual
Studio, you need to detach the debugger by Simulation ->Detach menu.
Printf
You can use it if your DLL build is VisualStudio2012(including express)
Release build with No buffer option on project settings.
Otherwise, different c-runtime will cause unstable display. In that case,
you must use vpi display call instead of printf.